Spook your guests with our DIY Head in a Jar project. You can create creepy Halloween decorations in just minutes!

Things are getting really creepy this Halloween! 🎃
Easily create frugal and creepy Halloween decorations with our DIY Head in a Jar idea using only water, masks, and a jar! Trick-or-treaters are going to love it…or fear it!
Halloween decorating can go beyond pumpkins and pretty fall wreaths. If you’re aiming for an extra dose of spookiness this year, this craft is perfect for adding a delightfully eerie touch to your home.
The results of these creepy Halloween decorations are unreal!

I’ve never been a huge Halloween fan, but my two boys enjoy scary things, so I’ve started to come around to the idea of adding some creepy Halloween decorations to our home.
Oh, the things we do for our kids. 😂
My Hip sidekick, Lina, made this craft years ago so last year I decided to make my own! My boys got such a kick out of it and it also makes for some great decor during trick-or-treating!

All you’ll need to make these creepy Halloween decorations is a creepy mask (the more realistic, the better!), a glass jar, and water!
You could even consider adding a glow stick and/or gluing fake eyeballs to the masks for an even creepier effect!

The masks I used last Halloween are no longer available, but here are some I spotted online that would be perfect for this DIY Head in a Jar project!
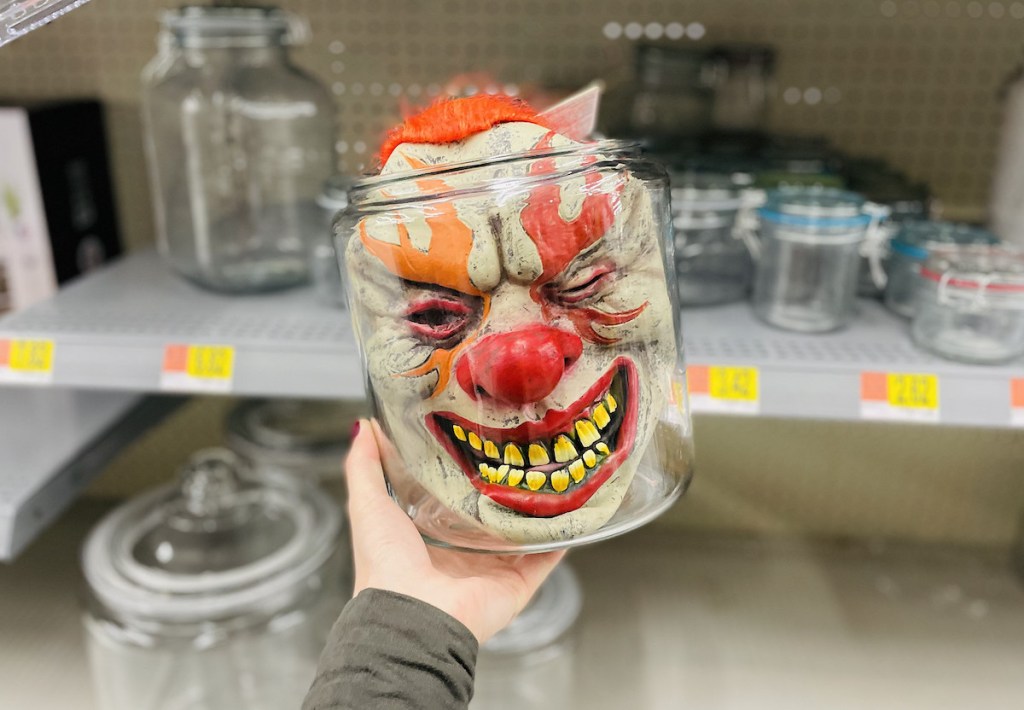
- Horror Evil Clown Mask – $19.99
- Scary Smiling Demon Halloween Mask – $12.99
- Frankenstein Mask Goosebumps Mask – $23.99
- Old Man Halloween Mask – $18.99
- Halloween Zombie Vampire Mask – $23.99
- Joker Mask with Green Hair – $24.90
Heading in the store? I found a larger selection at my local Walmart and many of the more affordable masks weren’t available online.

As another idea, head to your local thrift store for a possible score! While I didn’t have any luck with mine, you may be able to find a creepy mask for just a couple of bucks, which makes this easy DIY even easier on your wallet!
You can make this Halloween DIY even more frugal if you already have a mask lying around. 👏🏻
*Note that masks made of hard plastic are not ideal for this craft.

Hip Tip: Dollar Tree also has tons of Halloween masks to choose from if you’re on a really tight budget. I personally didn’t feel their masks last year were that great so I opted for the more realistic options at Walmart for mine despite being more expensive.
I found gallon-sized jars work best to fit my Halloween face masks and since I didn’t have any laying around, I grabbed a few at Walmart.
Plus, these glass storage jars are super trendy right now, so even though they weren’t the most frugal idea, they can easily be repurposed. Consider using them as a pretty pantry storage idea or even for regifting as Lina did for this Christmas idea!
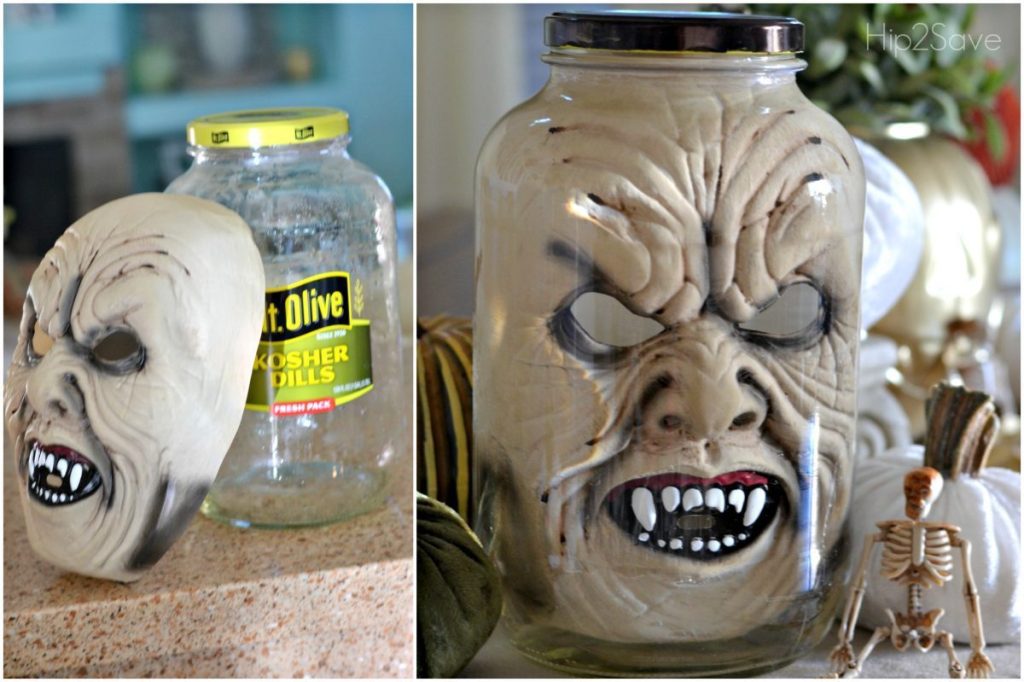
A gallon-sized pickle jar is a frugal option for this DIY, too.
If you have one lying around or plan to purchase a jar of pickles for your upcoming Halloween party, Lina originally shared these creepy Halloween decorations using an old jar she had!
That makes this DIY Head in a Jar potentially FREE is if you have a jar and a mask already! 👏🏻
This sealed or air-tight glass jar idea is best if you plan to place your creepy Halloween mask jars in places they could potentially be knocked over.


Halloween Heads in a Jar
PrintSupplies Needed
Directions
1
Gather your creepy Halloween face masks and gallon-size jars. Again, the creepier and more flexible the mask, the better your outcome will be!

2
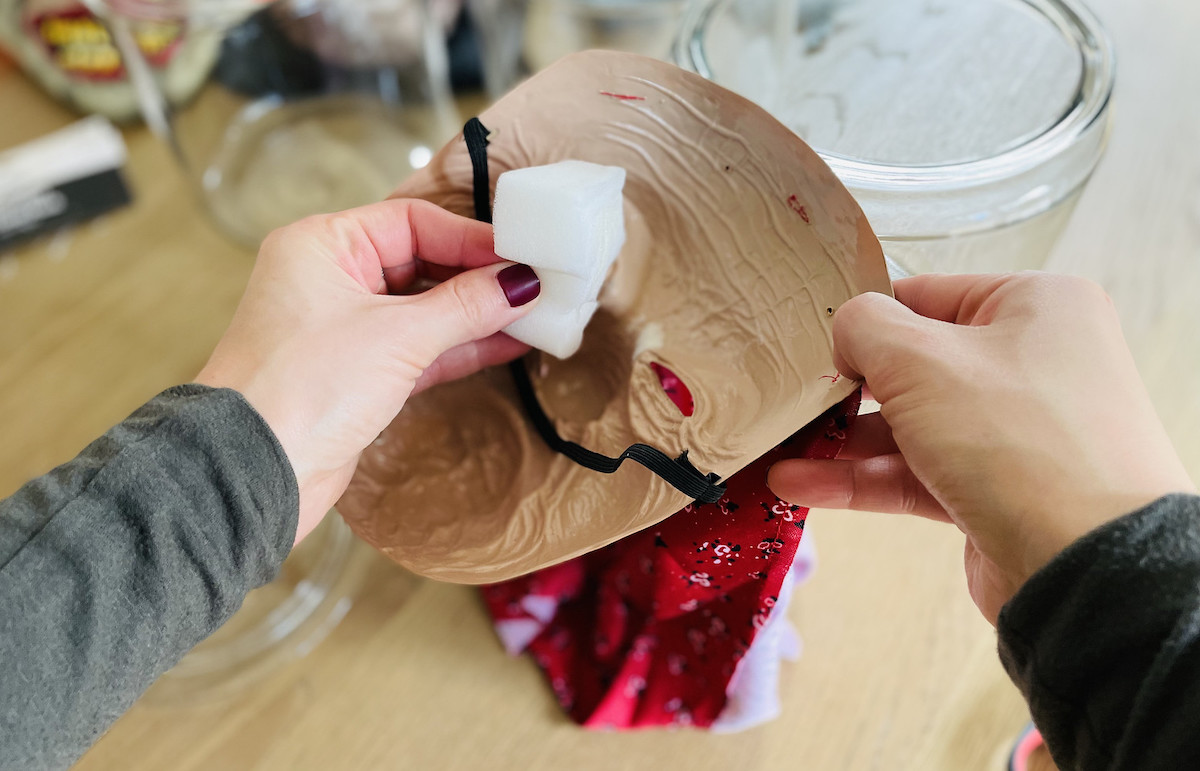
Take off any foam padding from inside and cut off black elastic straps. This step is optional, but encouraged so it doesn’t take away from the realistic look once complete!
3
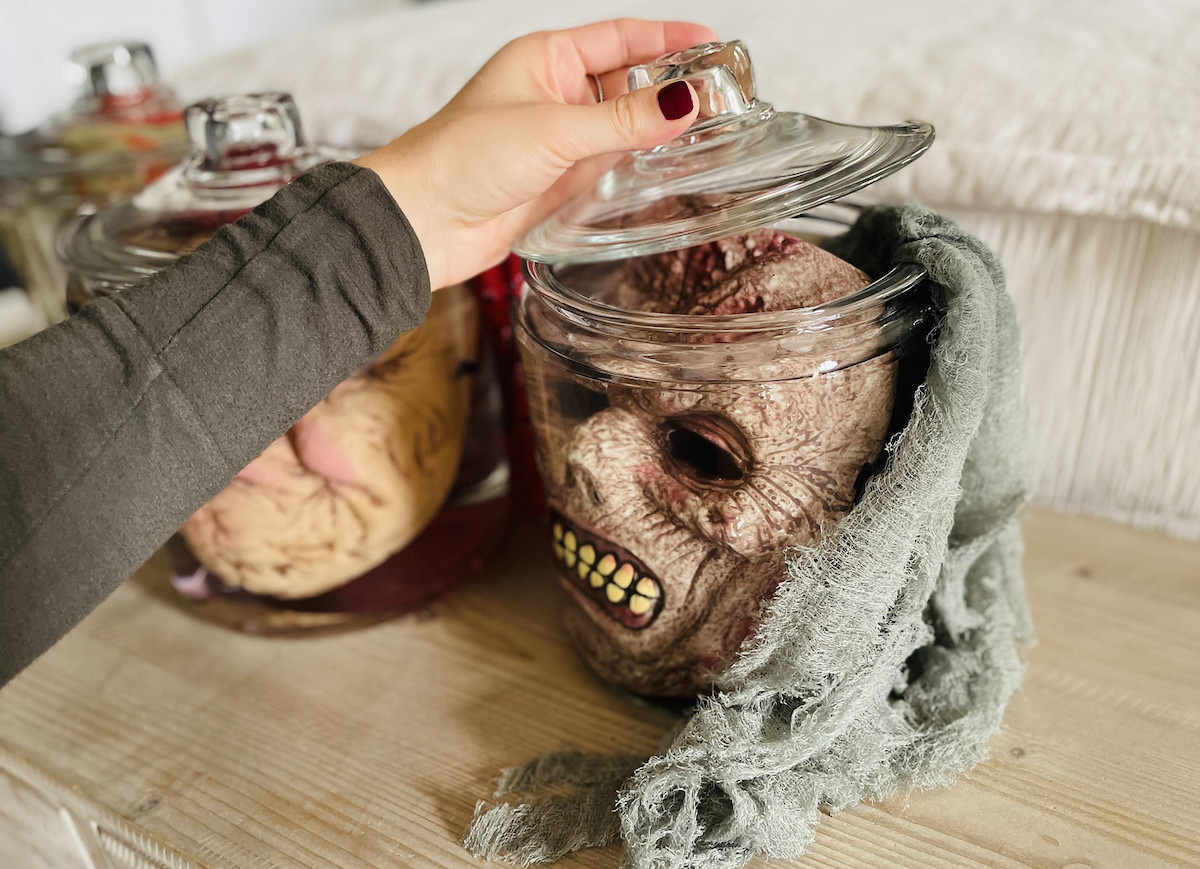
Place your Halloween mask in your jar and fill it with water until full. You may have to reposition the mask as it fills.
Hip Tip: One of my masks had hair and it did just fine in the water. However, you can also opt to have some stick out of the lid as I did with the Granny & Zombie masks. This also helps hide the mask’s back and make it look more realistic.

4
Place your lid on once your jar is full and your mask is positioned the way you want it.
5
Now you get to enjoy your creepy Halloween decorations!
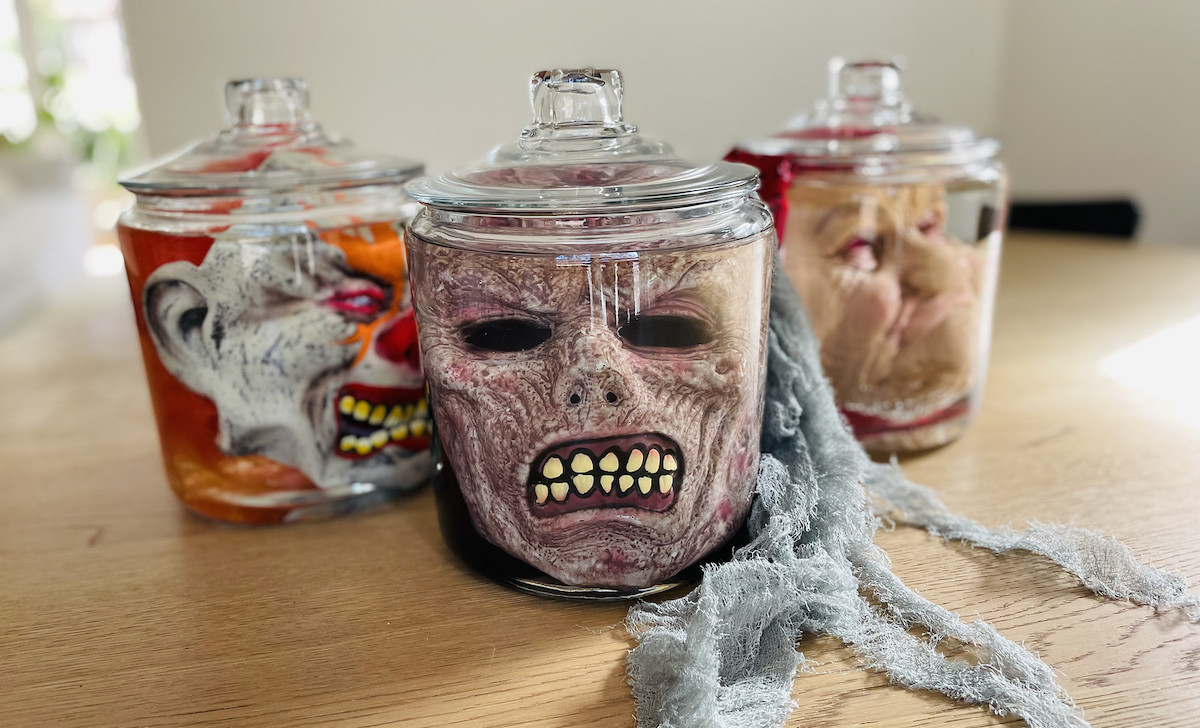

Save your creepy Head in a Jar decorations for next year!
Once Halloween is over, empty your jars and lay your masks out to dry so you can save them for next year’s creepy Halloween decorations! 👏🏻

Well, I’m not sure what our neighbors will think, but the boys are getting a kick out of these simple and creepy DIY Halloween decorations! LOL! 🤣
Happy Halloween, Hip2Savers! 🎃👻
Oh, and don’t forget, if you make this fun & creepy DIY, share your Halloween decor with us by tagging us on Facebook or Instagram! We love seeing all your holiday creations and we love hearing from you even more!
WOW! Lina did this Halloween craft with a laundry pod container! 😱🤯😍