3 months ago
23
3 months ago
23
The post 23 Pumpkin Carving Ideas for When Pinterest Makes You Feel Inadequate appeared first on Penny Pinchin' Mom.
That carving kit has been sitting in your drawer for three years because the tiny saw feels like a surgery tool and Pinterest pumpkins look carved by professionals. You want a pumpkin on your porch that looks intentional, not like you gave up halfway through.
I used to stand in front of blank pumpkins feeling the same pressure, back when the kids were little, and I thought every holiday decoration had to look magazine-perfect. It doesn’t.
These 23 designs don’t require artistic skill or steady hands. The Classic Triangle Jack-o’-Lantern takes ten minutes and never fails. Cookie Cutter Constellations let you use cookie cutters to guide your cuts. Drill-Dot Designs mean no sawing at all, just holes that glow. Most come with free stencils you can tape and trace.
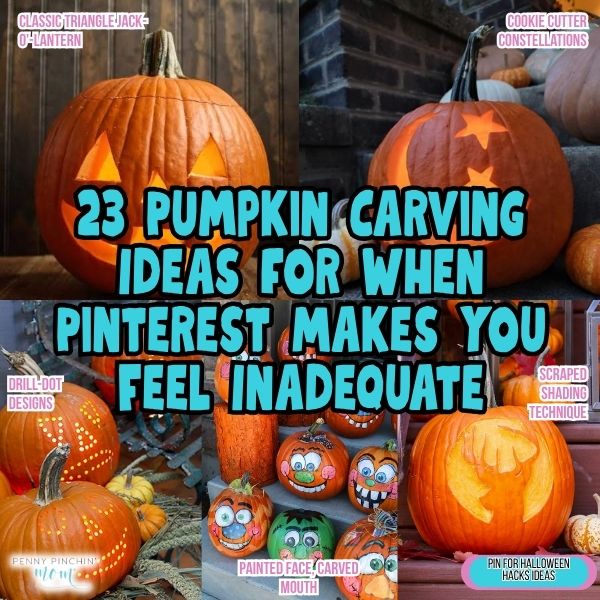
1. Classic Triangle Jack-o’-Lantern
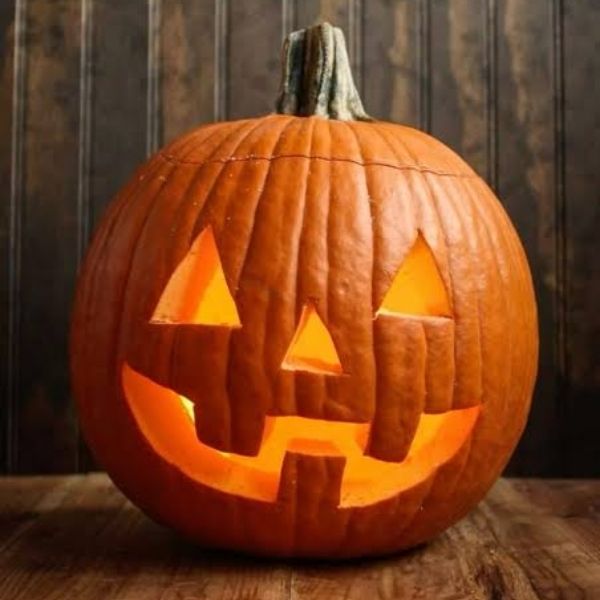
Your basic carving kit already has everything you need for this one. Triangle eyes, triangle nose, toothy grin. About 15 minutes from start to finish, and honestly, this is what most trick-or-treaters expect anyway. The trick is making your triangles different sizes. Big eyes, smaller nose, mix of big and small teeth. Draw your design with a dry-erase marker first so you can wipe it off and adjust before you commit to cutting.
2. Cookie Cutter Constellations
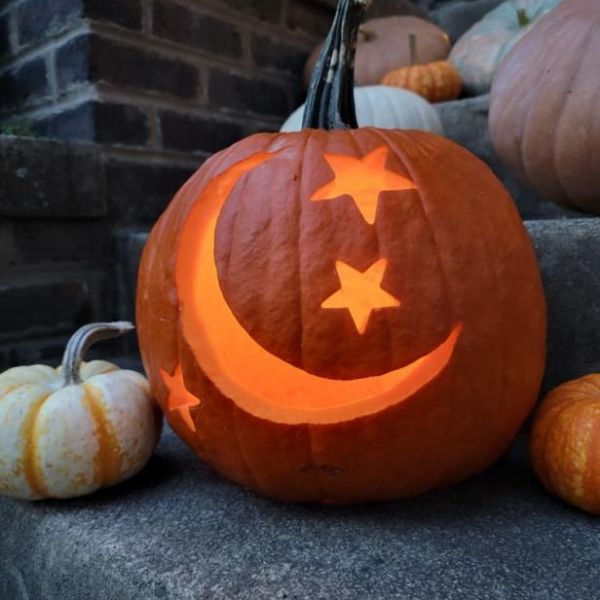
Those metal cookie cutters collecting dust in your drawer work perfectly for pumpkin carving. Stars, hearts, moons. Press them partway into the pumpkin skin to make an outline, then carve along the indent with your basic saw tool. You’ll finish in about 20 minutes for a whole constellation pattern. Works best on the flatter sides of your pumpkin where the cutters can press evenly. Kids can help pick the pattern and press the cutters while you do the actual cutting.
3. Drill-Dot Designs
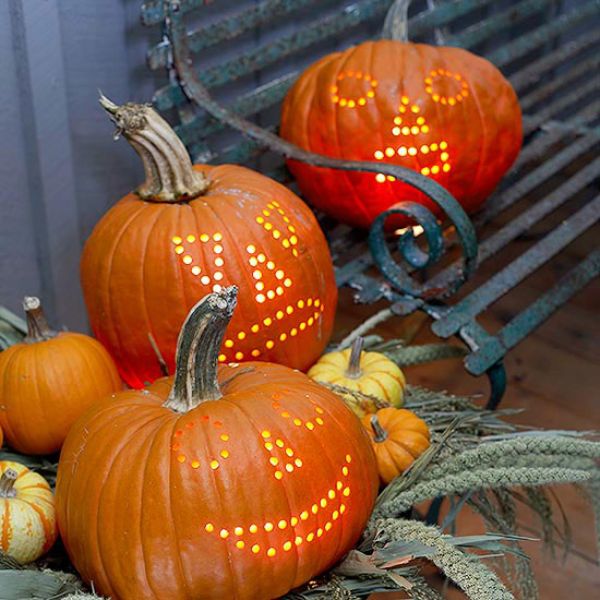
A regular power drill with a ¾-inch bit turns pumpkin carving into something closer to coloring by number. Print any simple image, tape it to your pumpkin, and drill through the dots. Silhouettes work best: witch hat, haunted house, spider. The whole project runs under $5 if you already own a drill, and you just need a pumpkin. 10 minutes once your pattern is taped on. The light shining through the holes looks surprisingly good at night, and there’s zero chance of messing up a carved line.
4. Painted Face, Carved Mouth
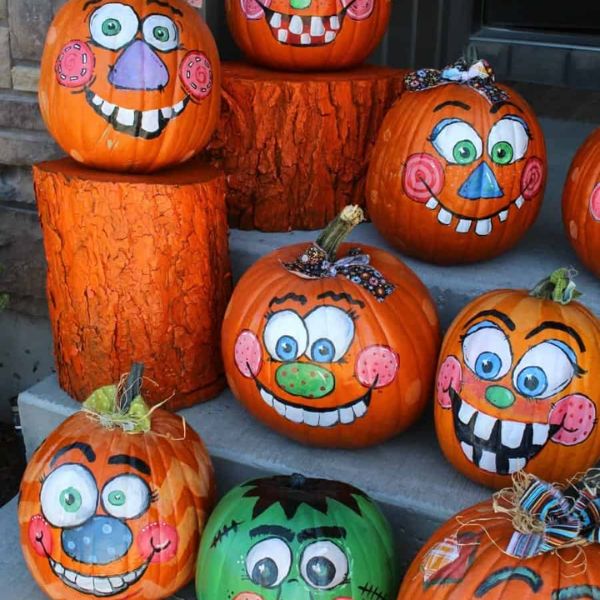
When my oldest was little and said she wanted to carve but was scared of messing up, we split the difference. Paint the eyes and nose with black acrylic paint (under $2 at any craft store), then carve just the mouth. You get the carved pumpkin smell and the glowing mouth, but way less pressure. The paint dries in about 30 minutes, then carve. This method cuts your carving time in half, and painted features can be as simple or detailed as you want. Mistakes wipe off with a damp paper towel before the paint fully dries.
5. Scraped Shading Technique
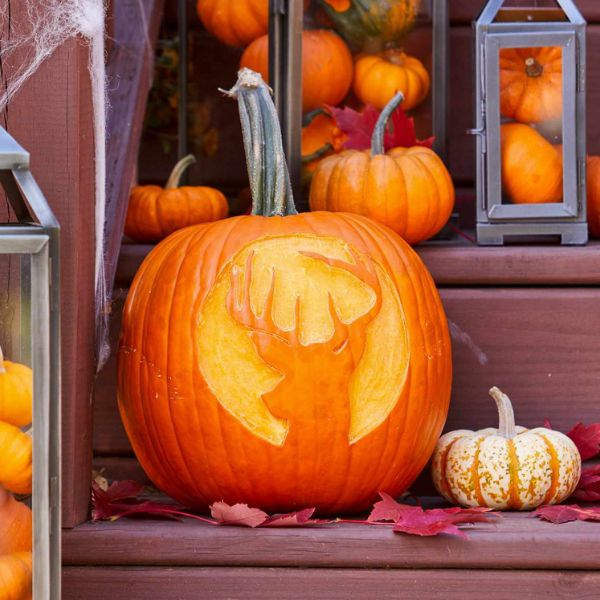
You don’t have to cut all the way through the pumpkin. A potato peeler or the scraping tool in your carving kit lets you shave off just the outer skin in certain areas. The thin spots glow orange instead of bright yellow when lit. Perfect for adding dimension to simple designs like a moon, cat silhouette, or even just decorative swirls around a carved face. Expect around 20 minutes, and it feels fancier than it is. Start with light pressure and scrape deeper until you see the glow you want when you test your candle.
6. One Giant Eye Cyclops
Kids think this one is hilarious. Carve one huge circle in the center of your pumpkin (about 4-5 inches across), add a smaller circle inside for the pupil, and you’re done. Maybe 10 minutes total. The single eye looks goofy and a little creepy at the same time. You can angle it to look up, down, or sideways by placing it off-center. Add a scraped eyebrow above it if you want, but honestly, the eye alone gets the point across.
7. Bat Silhouette With Free Stencil
Better Homes & Gardens has free printable bat stencils that are easy to follow. Tape the stencil to your pumpkin, poke holes along the outline with a pin or the poker tool from your kit, remove the paper, then connect the dots with your saw. The whole bat runs maybe 25 minutes. Simple wing shapes, small body, pointed ears. Looks impressive but doesn’t require any artistic skill since you’re tracing. Cut just the bat shape and leave the rest of the pumpkin solid for maximum contrast.
8. Emoji Pumpkins
The laughing-crying emoji or the heart-eyes one translate perfectly to pumpkins. Oval eyes, big smile, maybe tears or hearts. These run 15-20 minutes depending on which emoji you pick. The proportions are already exaggerated and cartoony, so you can’t mess them up. My grandkids requested these last year, and they got more comments from neighbors than my fancy attempt at a spider web. Draw it freehand with a marker or find emoji templates online. The simple shapes are easier than traditional jack-o’-lantern faces.
9. Geometric Triangles Pattern
Modern and clean-looking without requiring any skill. Carve a scattered pattern of different-sized triangles across the front of your pumpkin. No specific design, just random placement. Plan for roughly 30 minutes to carve 15-20 triangles. The irregular spacing makes it look intentional and artsy. This works well if you’re setting out multiple pumpkins because you can vary the triangle sizes and density on each one. Use your basic triangle cutter or just freehand them with your saw. Nobody will know which triangles were planned and which were improvised.
10. Cat Face With Arched Back
The classic black cat pose fits perfectly on a round pumpkin. Carve a simple cat silhouette on one side: arched back, tail up, pointy ears. Find free stencils at Pumpkin Pile and HGTV’s website. The curved back follows the pumpkin’s natural shape, which makes it easier to carve than you’d think. About 30 minutes total. You can add a scraped moon behind the cat or leave the background solid. Position the cat facing left or right depending on where your pumpkin will sit on the porch.
11. Toothy Grin With Carved Fangs
Two triangle fangs pointing down turn a regular smile into something slightly sinister. Carve a wide, curved smile, then add two longer triangles in the vampire spots. The whole face runs maybe 20 minutes. Works with any eye shape: circles, ovals, triangles, whatever feels right. The fangs don’t have to be perfect. Slightly crooked fangs look more authentic than symmetrical ones.
12. Starry Night Clusters
Small star cutouts grouped together in clusters across your pumpkin create a night sky effect. Use a metal star cookie cutter to trace, then carve out maybe 10-15 stars in different sizes. Figure on about 35 minutes total. Space some stars close together, leave others isolated. The random spacing looks more natural than a grid pattern. You can add a carved crescent moon on one side if you want, but the stars alone read clearly as a theme. This design works on pumpkins that aren’t perfectly round since you’re working with the whole surface.
13. Monster Mouth With Cutout Teeth
Carve a huge, gaping mouth across the bottom third of your pumpkin. Then carve individual teeth as separate cutouts instead of leaving them attached. The teeth look like they’re floating, which adds to the monster effect. You’ll finish in about 25 minutes and use only your basic saw tool. Make some teeth pointy, some square, some crooked. The imperfection makes it look more creature-like. Scraped areas around the mouth add dimension if you want to spend an extra 10 minutes, but the mouth alone works fine.
14. Spiral Design From Center
Starting at the center front of your pumpkin, carve a spiral that winds outward toward the edges. One continuous curved line. About 20 minutes of carving, and it’s oddly satisfying to follow the curve around and around. The spiral reads as intentionally artistic even though you’re just making one long cut. Works best on smooth pumpkins without deep ridges. You can make it a tight spiral or loose and loopy. Both look good when lit. This design proves you don’t need a complex pattern to make something that looks different from every other pumpkin on the block.
15. Ghost With Surprised Expression
Round eyes, round mouth, simple wavy bottom edge for the classic ghost sheet shape. Free ghost stencils are on websites like Crazy Little Projects and The Spruce Crafts. Expect around 20 minutes total. The surprised expression (round open mouth) is easier to carve than a smile and reads clearly from the street. You can make the ghost tall and skinny or short and wide depending on your pumpkin shape. Add small oval eyes for cute or larger circles for spooked. The wavy bottom doesn’t have to be perfect. Ghosts are supposed to look a little uneven anyway.
16. Peek-a-Boo Window Squares
Carve 4-6 small square windows like you’re looking at a haunted house from the outside. Each window is maybe 2 inches across. Plan for roughly 30 minutes total. Space them randomly across the front of your pumpkin, or line them up in rows. You can add small details inside each window (a tiny bat, skull, or cat eyes) or leave them empty. The multiple light sources create an interesting glow pattern that’s different from one big carved face. Kids like hiding small toys or candy in the windows during the day before you add the candle.
17. Bold Zigzag Smile
Instead of a curved smile, carve sharp zigzags like lightning bolts. Pair it with any simple eye shape: circles, triangles, or ovals. The jagged mouth runs maybe 15 minutes and looks more dynamic than a regular grin. Each zag doesn’t have to be the same size. Varying the zigzag widths makes it look more energetic. This style works for both scary and silly pumpkins depending on the eyes you pair it with. Sharp angles are often easier to carve cleanly than smooth curves, especially if your pumpkin has some texture to the skin.
18. Half-Face Design
Carve your jack-o’-lantern face on just one half of the pumpkin and leave the other half solid. One eye, half a nose, half a smile. It looks intentionally asymmetrical and artistic. 15 minutes since you’re carving half as much. Position this pumpkin so the carved side faces your walkway or door. The solid side can face the yard or wall. This technique also works if your pumpkin has a bad spot or soft area on one side. Just make that the uncarved half, and nobody will know you were working around a flaw.
19. Witch Hat Silhouette
A pointed witch hat is one of the easiest recognizable shapes to carve. Wide brim, tall cone, maybe a small buckle detail. Download templates from Martha Stewart’s website and Pumpkin Lady. You’ll finish in about 20 minutes and require just your basic saw. The pointy top fits nicely on taller pumpkins, while wider pumpkins work well with a hat that has an exaggerated brim. Add a scraped moon beside it or leave the hat standing alone against the dark pumpkin background.
20. Simple Crescent Moon
One curved crescent moon carved on the front of your pumpkin. That’s it. Maybe 10 minutes. You can add stars around it using the drill method or leave it alone. The single moon shape is easier to carve than most people think because you’re just making two curved lines that meet at points on each end. This worked perfectly the year I was helping my daughter with her college applications and had zero time for elaborate decorating. Clean, classic, and nobody questioned whether it was “enough” of a design.
21. Silly Cross-Eyed Face
Two circles for eyes positioned close together and slightly angled inward, oval nose, tongue sticking out from the mouth. Expect around 20 minutes, and it makes people smile instead of scream. The cross-eyed effect is just about eye placement. Carve them closer to the center than you normally would. The tongue is a separate small oval at the bottom of the mouth opening. Kids love this one because it’s goofy instead of scary. You can exaggerate the tongue size or add a scraped area around the eyes for extra silliness.
22. Carved Name or Initials
Instead of a face, carve your family name or your initials. Simple block letters work best and run about 20-30 minutes depending on how many letters. This personalizes your porch and looks polished without requiring artistic skill. Draw the letters with a marker first to check spacing. Leave plenty of pumpkin between letters so they don’t blend together when lit. This design works well if you’re setting out multiple pumpkins. Put your name on the biggest one and simple faces on the smaller ones around it.
23. Stacked Circles Face
Three circles stacked vertically: small on top for nose, medium in the middle for one eye, large on the bottom for the mouth. Then mirror it on the other side with the same pattern reversed. About 25 minutes total. The size progression creates a rhythm that looks more designed than random circles would. This accidentally became my signature design when my husband started carving with me, and we needed something we could both execute the same way. The matching patterns on each side create symmetry even though the individual elements are simple.
Your Porch Deserves a Pumpkin This Year
That carving kit doesn’t have to intimidate you anymore. You’ve avoided it because those Pinterest pumpkins felt impossible and the tiny saw made everything harder than it needed to be. These designs work for real people with limited time and zero artistic training.
Start with the Classic Triangle Jack-o’-Lantern if you need something done in ten minutes. Try Cookie Cutter Constellations if you want cookie cutters to guide your cuts. Grab your drill for Drill-Dot Designs when you need zero carving stress. The free stencils are right here waiting, and every single design glows beautifully when that candle goes in. You’re putting a pumpkin on your porch this year, and it’s going to look exactly like you meant it to.
The post 23 Pumpkin Carving Ideas for When Pinterest Makes You Feel Inadequate appeared first on Penny Pinchin' Mom.