5 minutes ago
2
The post 21 Laundry Room Organization Ideas for the Closet You Hide From Guests appeared first on Penny Pinchin' Mom.
Your laundry room isn’t a room. It’s a closet with bifold doors, a hallway nook, or a corner of the basement you close off before guests arrive. I used to pile everything on top of my machines until a bottle of fabric softener slid off during the spin cycle and landed in a basket of clean towels.
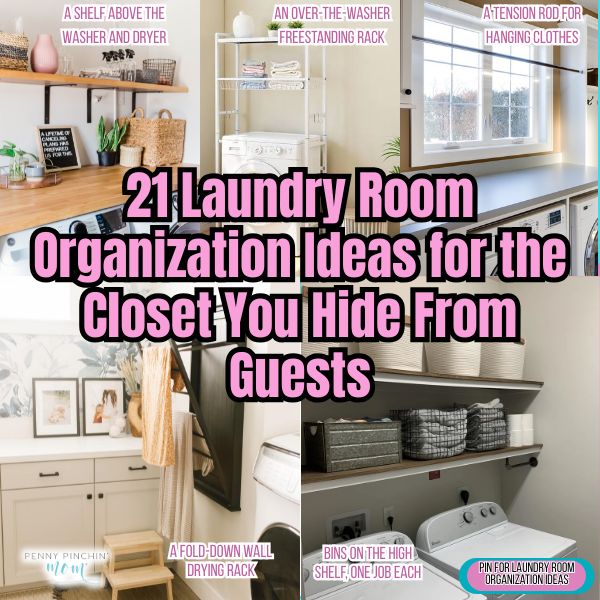
Laundry room organization doesn’t require a remodel. A shelf above the washer and dryer gets detergent and dryer sheets off that vibrating lid for good. An over-the-washer freestanding rack adds the same storage with zero drilling, which matters if you rent. A fold-down wall drying rack keeps wet clothes off the floor and folds flat when you’re done.
Above the Machines
1. A Shelf Above the Washer and Dryer
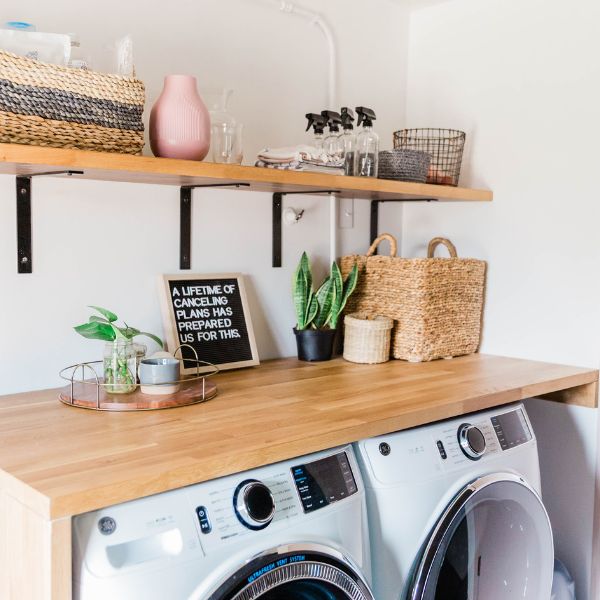
The wall above the machines is the only real storage most laundry closets have, so that is where laundry room organization starts. A white wire or laminate shelf runs about $18 to $25 at Walmart or Home Depot, and you may already have a spare closet shelf in the garage from a past project.
Mount it into studs. Drywall anchors give way once the machines start vibrating, and a shelf holding detergent plus a stack of towels is heavier than it looks. Leave at least 6 inches of clearance above a top-loading lid so it still opens all the way.
Renting? The freestanding version is next.
2. An Over-the-Washer Freestanding Rack
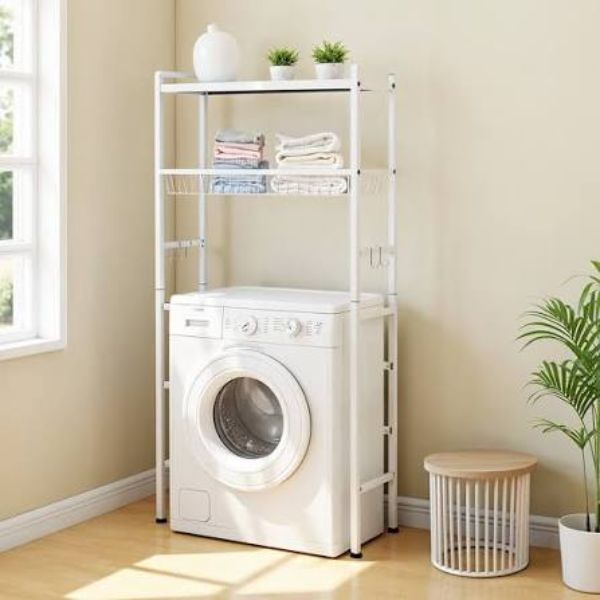
If you cannot put a single hole in the wall, a freestanding over-appliance rack solves the same problem with zero screws. The legs straddle the machine and rest on the floor, so the frame carries the weight and the wall carries nothing. Expect to pay about $40 to $70 at Target, Walmart, or Amazon, depending on how many shelves it has.
Measure three things before buying: machine width, machine depth including the hoses sticking out the back (usually 4 to 6 extra inches), and the height from floor to ceiling or to the shelf you already have.
The whole unit slides out when you need to reach behind the dryer. A mounted shelf will never let you do that.
3. A Tension Rod for Hanging Clothes
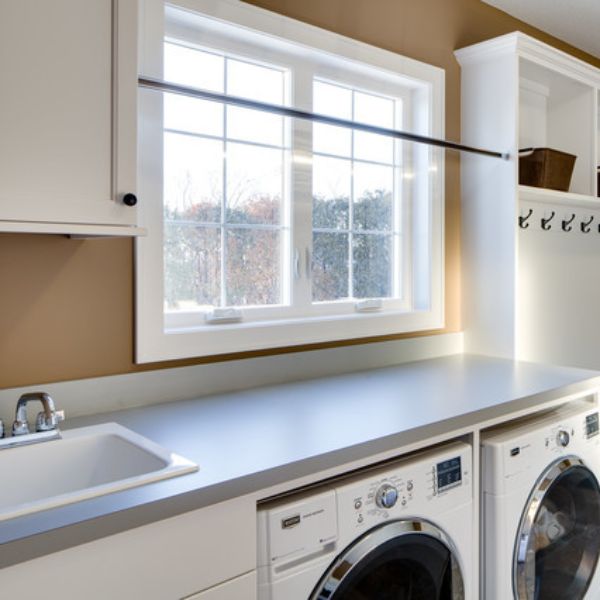
A spring tension rod wedged between the two side walls of a laundry closet gives you hanging space without a drill, a bracket, or a landlord conversation. Rods run about $8 to $15 at Walmart or IKEA, and a 28 to 48-inch adjustable one covers most closet openings.
Install it high, just under the shelf, and use it for drip-dry shirts, work clothes that cannot go in the dryer, and anything you pull out of the dryer on hangers so it never wrinkles.
Keep the load light. Three or four garments is the ceiling. Test it with weight the first day, and if it slips, add a rubber shelf liner scrap behind each end cap for grip. Small laundry room organization lives and dies on vertical inches like these.
4. A Fold-Down Wall Drying Rack
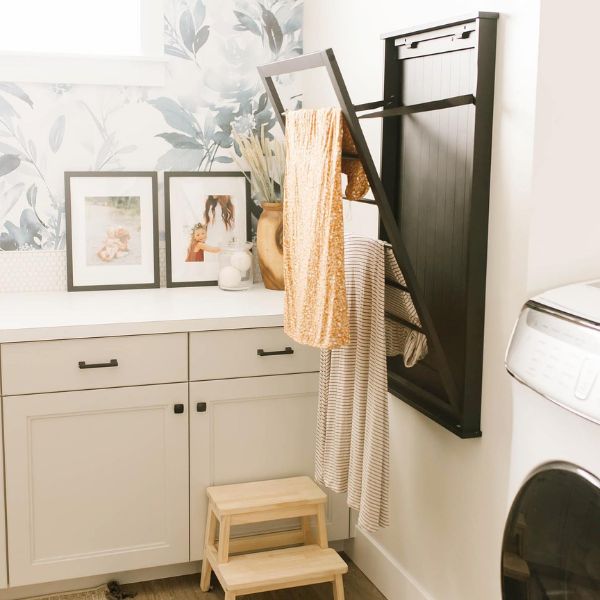
Wet laundry on the floor is the exact problem this fixes. A fold-down accordion rack mounts to the wall, opens out about 20 inches when you need it, and folds back to roughly 3 inches flat when you don’t. Plan on about $25 to $40 at Walmart or The Container Store.
It requires drilling into studs, so it belongs in a house you own. Hang it on the wall beside or above the machines, high enough that the dry ends do not drag on the washer lid.
Back when the kids were home, soccer uniforms and hand-wash sweaters lived draped over every door in the house on Saturday nights. A rack that folds away is the version of that I wish I had put up ten years earlier.
5. Bins on the High Shelf, One Job Each
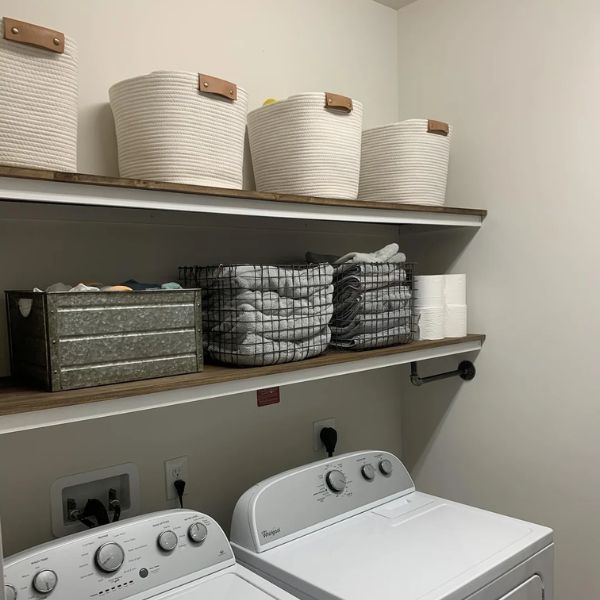
An open shelf turns into a ledge of loose junk in about two weeks. Baskets stop that. Check the house first, because a canvas bin from a kid’s old closet or a thrift store basket works exactly as well as a new one, which makes this $0 if you already own three. A set of three canvas or plastic bins comes in around $15 to $25 at Target or Walmart.
Measure shelf depth first. Standard wire shelving is 12 or 16 inches deep, and a bin that overhangs will tip.
Each bin gets one job. Stain treatment in one, mending supplies and spare buttons in another, dryer balls and lint rollers in the third.
6. A Guard Rail Across the Front of the Shelf
If you have ever found the stain stick on the floor behind the dryer, this is why. Vibration slowly walks bottles and boxes toward the shelf edge until something lands. A second slim tension rod, about $8 to $12, run across the front of an open wire shelf stops the creep. A spare dowel or a bungee cord hooked between the brackets does the same thing for $0.
Set it 3 or 4 inches above the shelf surface, high enough to catch a tall bottle, low enough to lift things over easily.
This is the quiet fix that makes laundry room organization storage actually hold. Nothing falls, so nothing gets shoved into the gap behind the machines in frustration.
7. A Retractable Clothesline Above the Machines
For a basement corner with two facing walls, a retractable clothesline is more drying space than any rack, and it disappears when you are done. Pull the cord 10 to 12 feet across, hook it, and reel it back into its housing afterward. Expect about $20 to $30 at Walmart or Amazon.
This one requires drilling. The housing goes into a stud on one wall and the hook plate into a stud or a solid anchor on the other, because wet towels pull hard.
Hang it high enough that nothing brushes the top of the dryer. Swimsuits and camp towels dry here overnight instead of molding in a hamper.
8. Zone the Shelf by How Far You Reach
Pull everything off the shelf above the machines and put it back in three tiers: daily items at eye level, weekly items above that, and the once-a-season things like the carpet cleaner attachment on top. Twenty minutes, nothing spent.
Anything heavy belongs at the lowest, most secure point on the shelf, never balanced on the edge over a running machine. Anything you would not want a grandchild reaching goes up where small hands cannot get it.
If the top tier is genuinely out of reach, a folding step stool is about $15 to $20 at Walmart and slides flat beside the dryer.
Beside and Between
9. Measure the Gap Before You Order Anything ($0)
Grab the tape measure you already own (or pick one up for about $5 at Walmart if you don’t) and check the gap at its narrowest point, which is usually down low where the hoses and leveling feet crowd in. Measure floor to the top of the control panel too, since a cart taller than that won’t slide in.
Most gaps come in between 2 and 6 inches. Under 3 inches, a rolling cart isn’t happening, and ordering one anyway means a return trip and a shipping fee that can run $8 or more. Go magnetic instead, which is the next idea.
Five minutes with a tape measure saves money instead of spending it, and it’s the step most people skip before buying laundry room organization storage that doesn’t fit.
10. Magnetic Baskets on the Side of the Machine
Back when we were paying off debt, I line-dried everything I could, and the clothespin bag lived on the floor where it got kicked under the dryer roughly once a week. A magnetic basket would have fixed that for twelve dollars.
A two-pack runs about $12 to $20 at Target or Amazon. They stick to the steel side panel of a washer or dryer, no drilling, no adhesive, nothing a landlord will ever notice. Test with a refrigerator magnet first, since some painted front-loaders hold on the sides but not the fronts.
Fill them with clothespins, dryer sheets, mesh bags, and a lint roller. Detergent and pods are too heavy for the magnets, and they belong up high anyway.
11. A Magnetic Bar and Hooks on the Machine Side
The flat side of a washer is a vertical wall nobody uses. Three magnetic hooks and one magnetic paper towel bar cost about $10 to $18 total at Walmart, and they hold the cleaning tools you reach for constantly: the dryer vent brush, a spray bottle for stain pre-treating, and a rag for wiping down the lid.
Skip soft bags and mesh here since that’s what the baskets above already handle. This spot is for anything you grab mid-load and set right back.
That brush has hung there for three years.
12. A Narrow Sorting Cart
If your laundry space is a closet, a three-bin sorter the width of a dresser is never going to fit. A rolling cart under 12 inches wide does, and it tucks against the machine or beside the door between loads. A three-tier metal utility cart at Walmart or Target costs around $30 to $50, and the IKEA Raskog is around $45 and roughly 13.5 inches wide, so measure your clearance first.
Give each tier a job: whites on top, darks in the middle, towels and sheets on the bottom. Canvas bin inserts keep socks from falling through wire shelving.
On laundry day you pull the whole system out to the hallway instead of standing in a closet doorway sorting onto the floor.
13. Stackable Sorting Bins
Loose laundry piles on the floor get kicked into each other the moment someone walks through, which turns three neat piles into one tangled mess by load time. Stacking bins solve that by going up instead of out.
A set of three Sterilite or HOMZ stackable bins costs about $18 to $30 at Walmart, usually in the 18 to 20-quart range, and they lock together into a column maybe 30 inches tall with a footprint smaller than a laundry basket. Check the garage first, because stackable bins migrate out there.
Pull the top bin off, carry it to the machine, stack it back empty. The column never spreads across the floor.
14. Sort by Load, Not by Person ($0)
Here’s the switch that makes sorting bins actually get used: label them by wash cycle. Whites, darks, towels and sheets, delicates. Clothes get sorted once, on the way into the bin, and then a full bin goes straight into the machine with no second round of sorting.
Labels cost nothing. Painter’s tape and a Sharpie work fine, and you can relabel in ten seconds when the system shifts. A label maker costs around $25 at Target if you want it prettier, but tape has lasted on my bins for years.
Fifteen minutes and a roll of tape make this the cheapest laundry organization idea on the list, and the one that holds everything else together.
15. Mesh Bags Hung Beside the Machine
A five-pack of zippered mesh laundry bags costs around $8 to $12 at Walmart or on Amazon, in assorted sizes. Hang them on one of those magnetic hooks or loop them over the handle of the gap cart so they’re right where you’re standing when you load.
Bras, delicates, and anything small go in before the load does. My grandkids’ socks are so tiny they’d vanish into a towel otherwise, so a bag by the machine means I’m not fishing one out of a fitted sheet in March.
Three bags stay in rotation, and the rest wait on the hook.
Behind the Door
16. An Over-the-Door Organizer
The back of the laundry closet door is usually the only square footage in the room nobody is using. A clear-pocket over-the-door organizer puts 20-plus small pockets there, and since you can see into every one, nothing gets buried the way it does in a bin. Most cost around $15 to $30 at Target or Amazon (mDesign and Honey-Can-Do both make them), and the metal hooks slip over the top of the door with no drilling at all.
Check the house first. A plain fabric shoe organizer from a closet you cleaned out does the same job for $0.
If the door is shorter than the organizer, cut off the bottom row and hem it with fabric glue. A panel dragging on the floor is a panel you’ll take down by February.
17. What Actually Belongs in Those Pockets ($0)
Not everything belongs on a swinging door. Fill the pockets with light, grab-and-go items: a stain pen, a lint roller, mesh delicates bags, safety pins, spare buttons, sock clips, dryer balls, a seam ripper, loose change from pockets. Keep each pocket under a pound or so, or the whole panel sags forward and the door stops closing.
What never goes on the door: detergent, pods, bleach, or stain remover. Pocket height on a door is kid height, and liquid in a swinging pocket tips.
Masking tape and a marker label the bottom row, $0 if you have both.
18. The Ironing Board on the Door
An ironing board wedged between the dryer and the wall is an ankle injury waiting to happen, especially when it slides out without warning. An over-the-door ironing board holder fixes that for about $15 to $20 at Walmart (Household Essentials makes the common one), and it hangs on the door with no screws.
The $0 version works too: two large Command hooks on the door face and a bungee cord you already own, looped around the board’s legs.
Either way the board stores flat against the door instead of leaning in a corner. Hang the iron’s cord over the second hook so the plug isn’t dangling at grandkid height.
19. Hooks for Hangers
Empty hangers are the clutter nobody plans for. They pile on top of the dryer, slide behind it, and tangle in a wire knot in the corner. An over-the-door hook rail with five or six hooks costs about $12 to $20 at Target or Amazon, slips over the door, and needs no drilling.
Assign the jobs: one hook holds the stack of empty hangers, two or three hold shirts hanging to dry, and the last one holds whatever came out of the dryer that needs to go upstairs.
A single over-the-door hook runs around $6 if that’s all the room you have.
20. Command Hooks on the Door Face
If you can’t put a single hole in a wall, the door face is your best no-drill surface. A multi-pack of six to eight Command hooks totals about $8 to $15 at Target or Walmart. Medium hooks hold roughly three pounds; large ones about five. A damp shirt is fine. A full laundry bag peels the strip right off the door.
Prep matters more than placement. Wipe the spot with rubbing alcohol, not an all-purpose cleaner, let it dry, press the strip for 30 seconds, and wait a full hour before hanging anything.
Laundry rooms are humid, and hooks that skip the alcohol step are the ones on the floor by spring.
21. If You Have Bifold Doors
Bifold doors won’t take an over-the-door hook. The panels are thin and hollow; the hooks won’t clear the track, and the whole thing binds the first time you fold it. Our first apartment had bifolds on the laundry closet, and I learned that the hard way with an organizer I’d already cut to size.
Adhesive hooks on the inside face of one panel are the workaround. Keep every hook on the panel away from the hinge and track side, and stay under three pounds per hook.
A small hanging canvas pouch, about $8 to $12 at Target, holds dryer sheets and clothespins without adding bulk. Flat and light is the rule bifolds enforce.
Close the Door With Confidence
That closet with bifold doors doesn’t have to stay a dumping ground. The fabric softener bottle sliding into clean towels was my breaking point, but yours doesn’t have to involve a mess at all. A few small changes make this space work instead of just existing behind closed doors.
Start with A Shelf Above the Washer and Dryer if you need detergent off that vibrating lid for good. Try A Fold-Down Wall Drying Rack if floor space is tight, or add Magnetic Baskets on the Side of the Machine when you want storage without a single tool. Most of these laundry organization ideas run under $25. Pick one, give it a try this week, and let that closet finally earn its keep.
The post 21 Laundry Room Organization Ideas for the Closet You Hide From Guests appeared first on Penny Pinchin' Mom.